Summary of Contents
About the pose
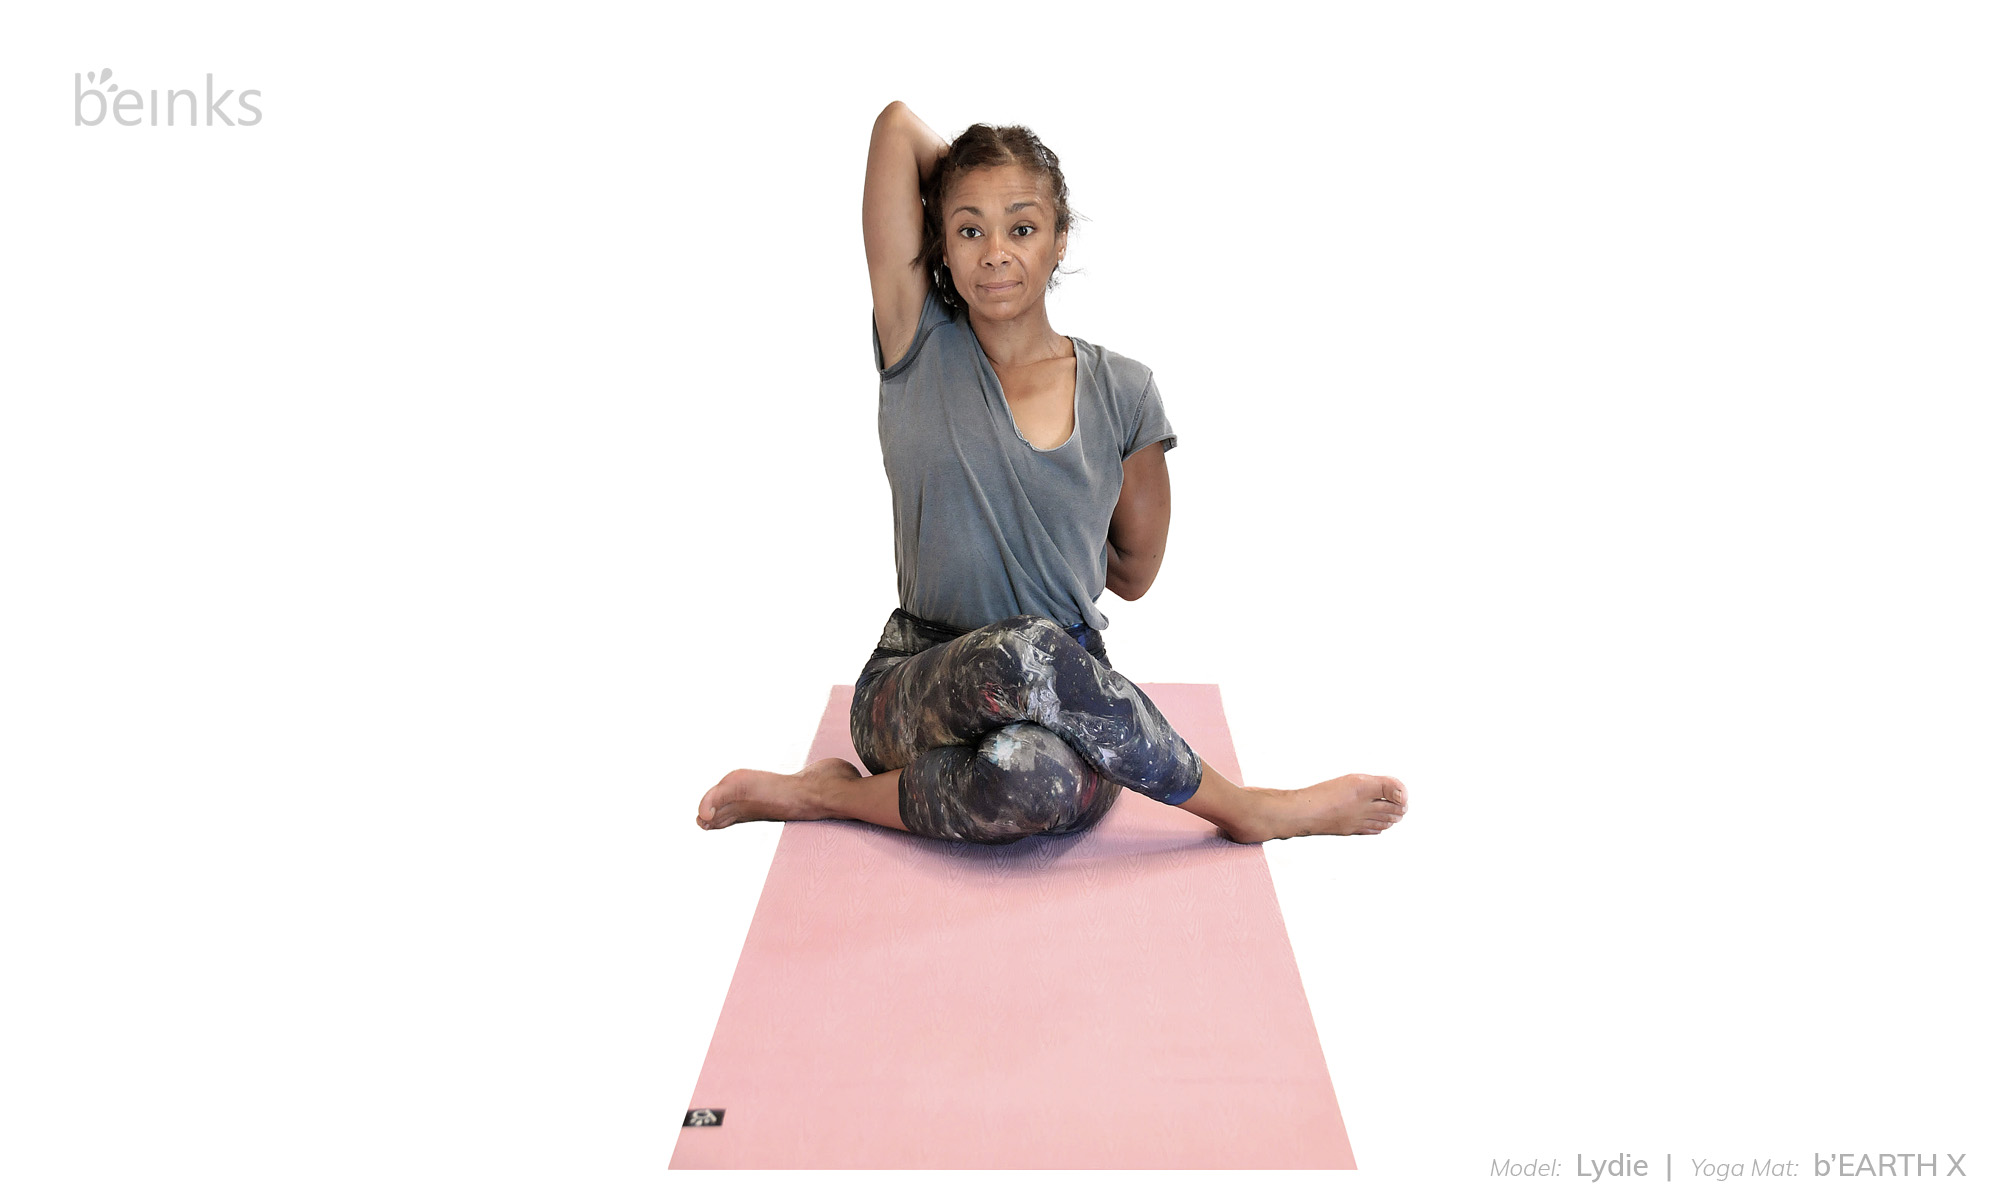
Gomukhasana (Cow Face Pose): the name comes from the Sanskrit words ‘Gow’, meaning ‘Cow’ and ‘Mukha’, meaning ‘Face’ or ‘Mouth’. The word ‘Go’ also means ‘light’, so “Gomukh” may refer to the light in or of the head, or lightness of the head. The yoga pose gets its name because the thighs and calves of the person performing it resemble a cow’s face, wide at one end and tapering towards the other. This pose is a seated pose and is considered as an Intermediate Level Pose and requires flexible thighs and shoulders.
Cow Face Pose is considered a base pose as cow face pose variations can be derived from this pose. Cow Face Pose helps boost energy in the body and hence can be included in flow yoga sequences.
Anatomy
Cow Face Pose benefits the following muscles and hence can be included in yoga sequences with the corresponding muscle(s) focus:
- Arms and Shoulders
- Middle Back
- Upper Back
- Biceps and Triceps
- Hamstrings
- Hips
- Knees
- Pelvic
- Quadriceps
How to do the pose
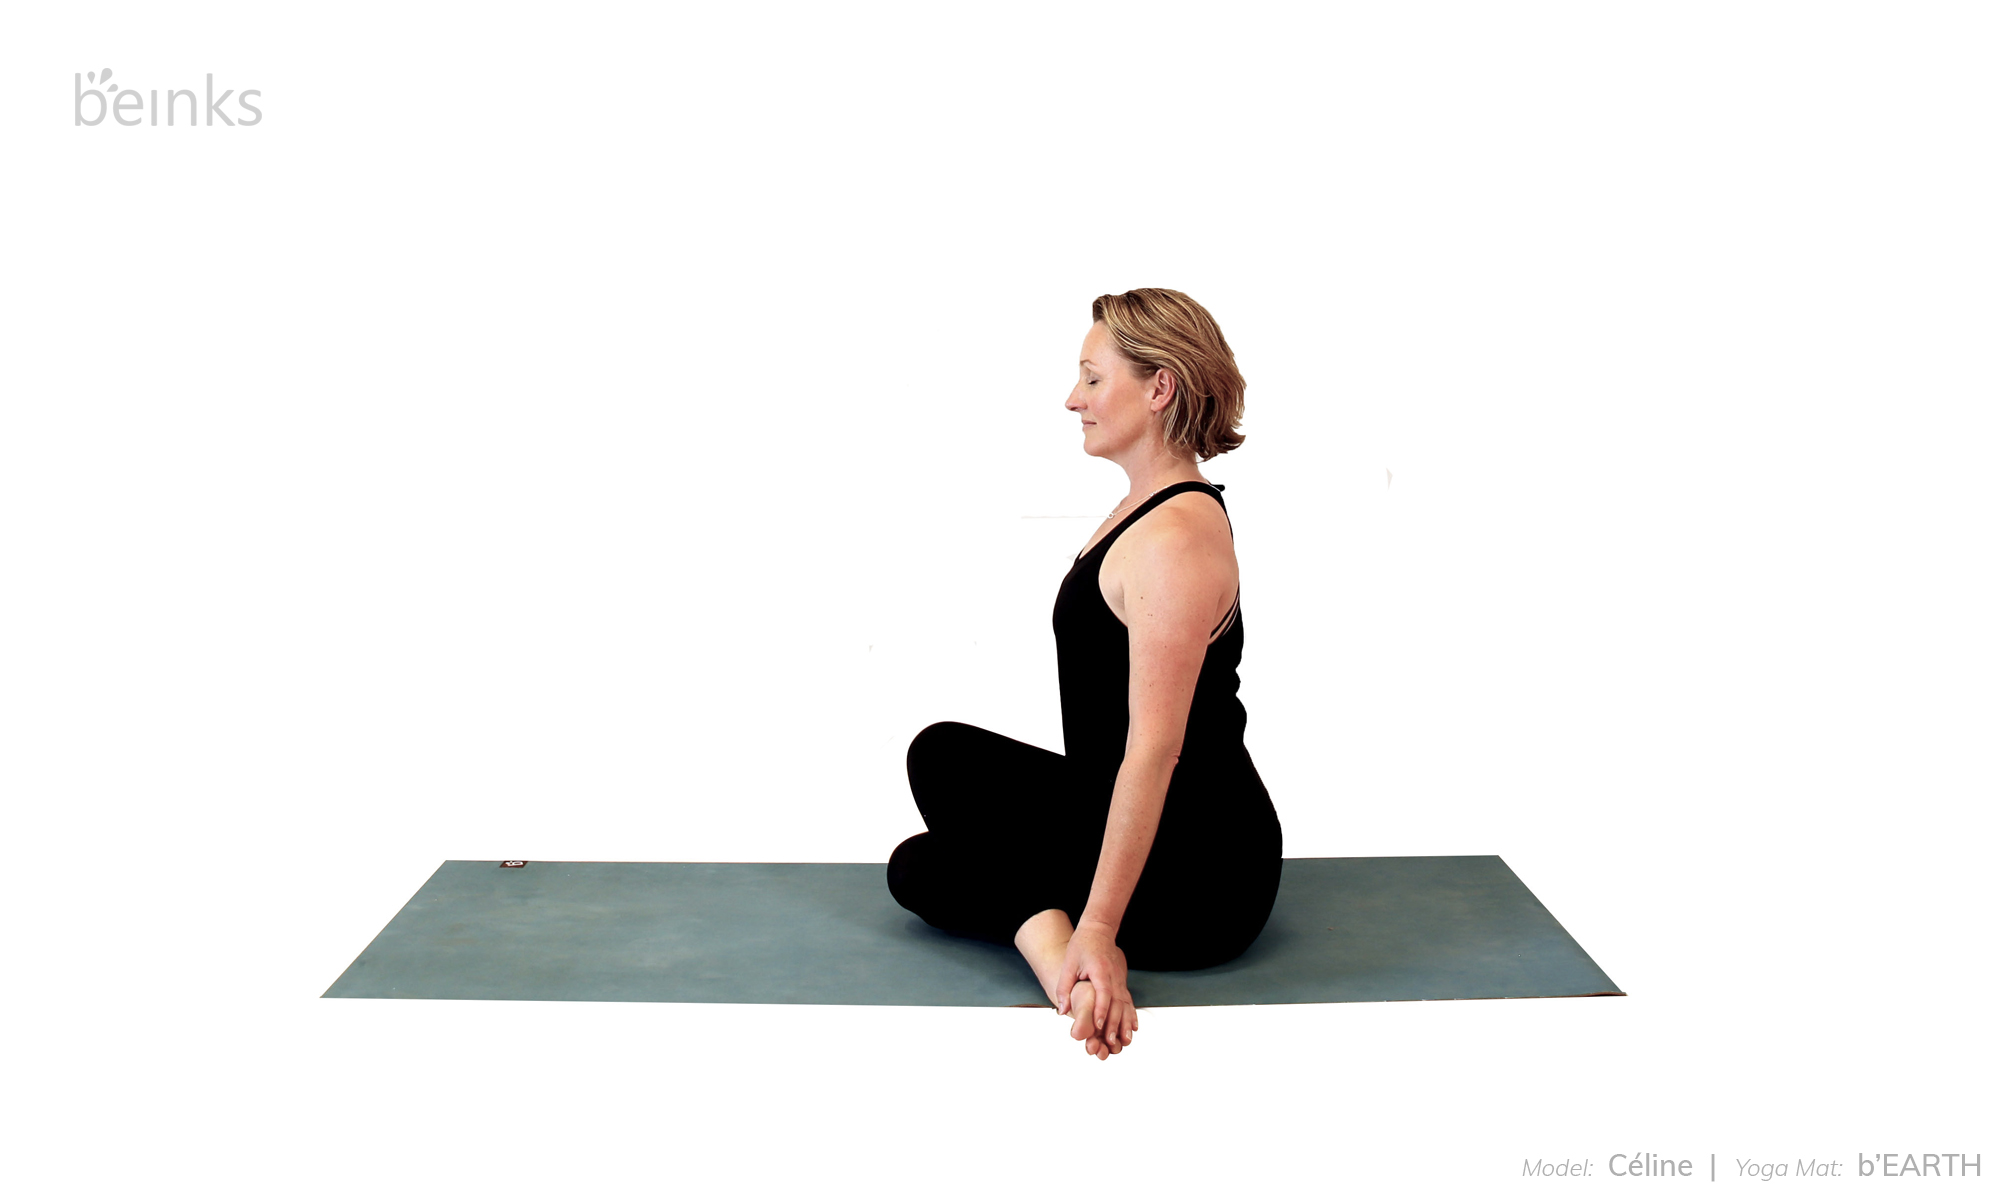
- Start in Dandasana (Staff pose).
- Bend the right knee. Bring your left foot to the outside of your right hip, weaving it underneath your right knee. Bring your right foot to the outside of your left hip, so that your right knee is stacked on top of your left knee.
- Ground through your sitting bones.
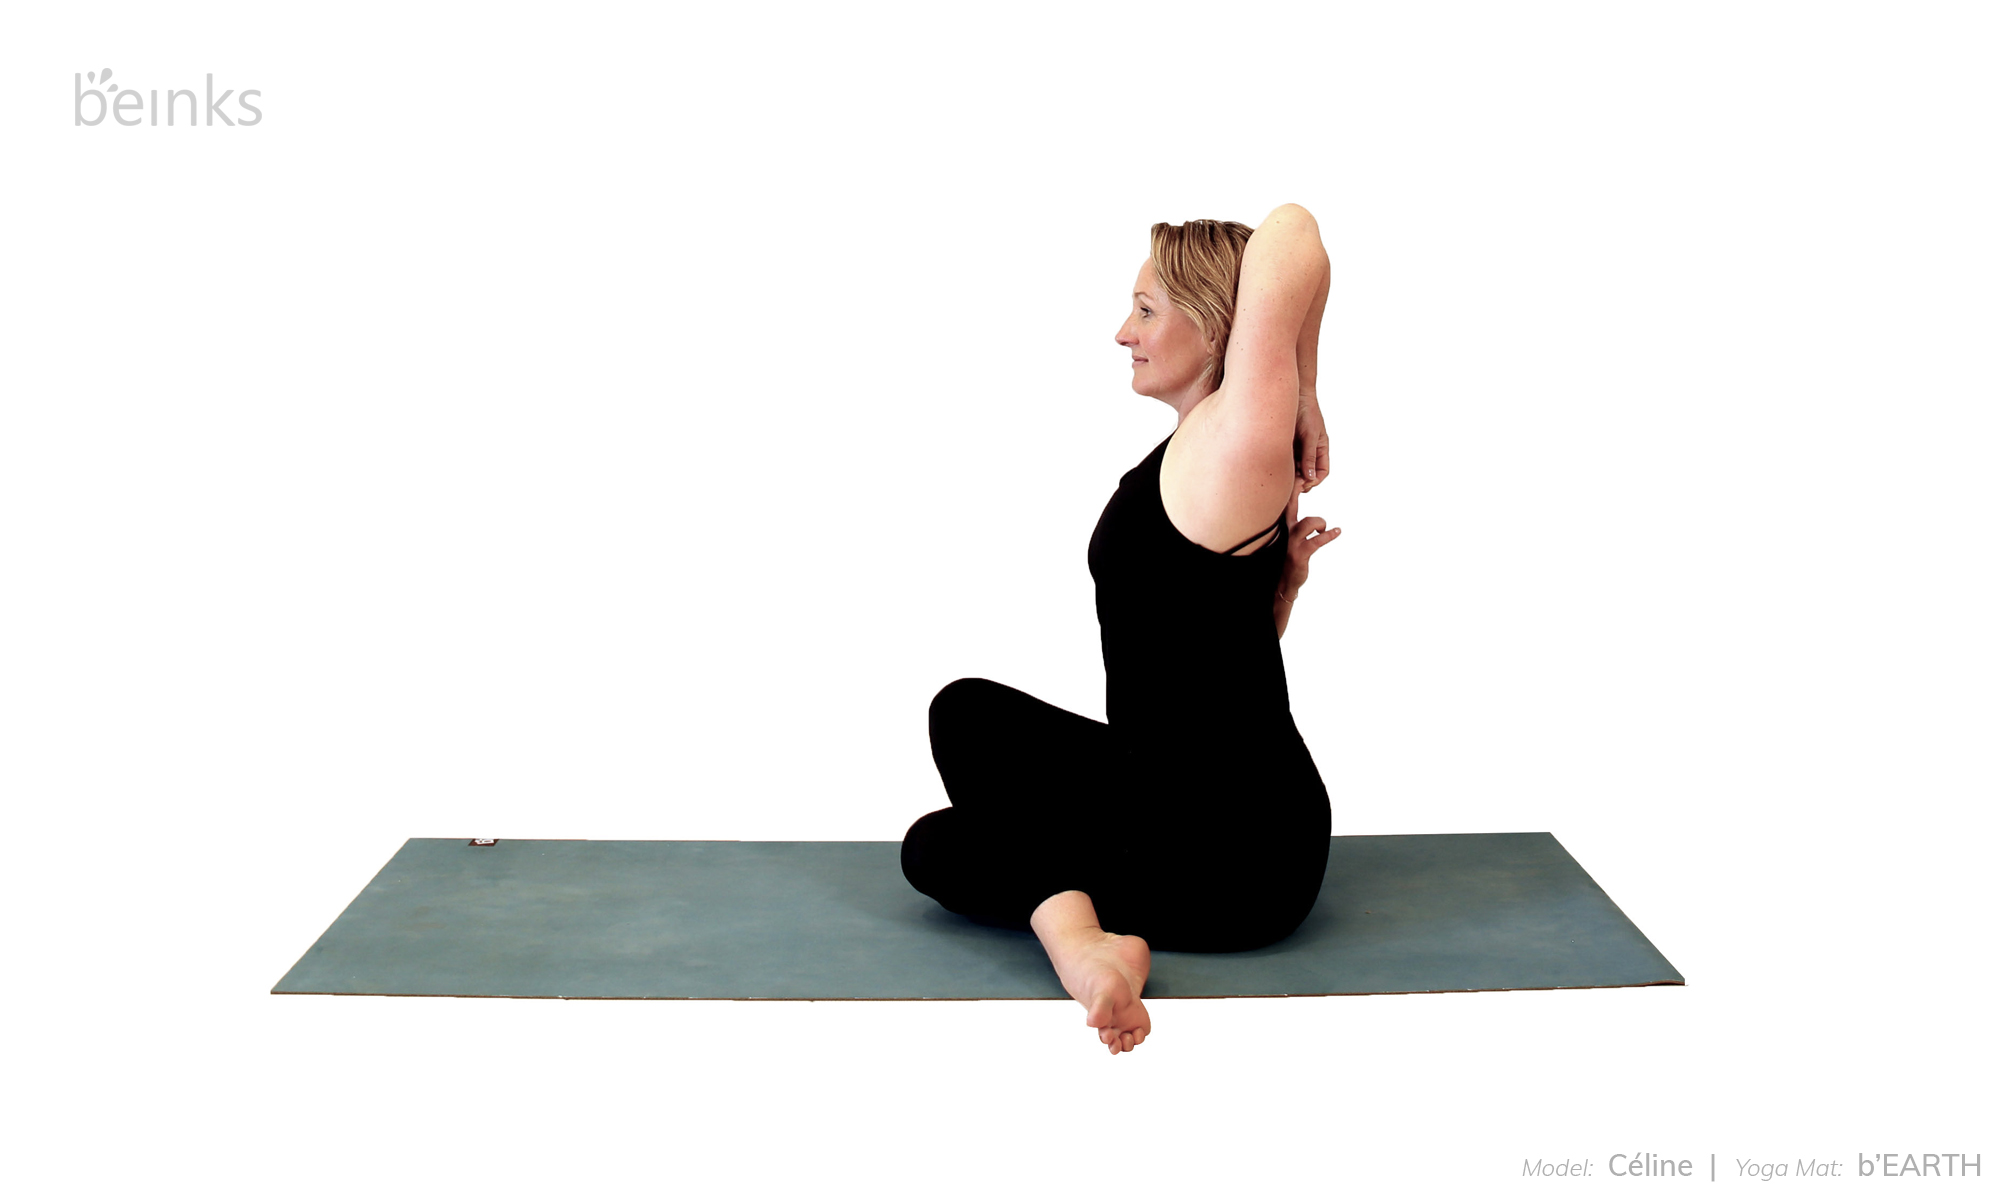
- As you inhale, lengthen your spine and stretch your arms out to the sides, palms facing forward.
- Internally rotate your right shoulder so that your palm faces to the wall behind you and your thumb points down. Sweep the arm behind your back, walking your hand up between your shoulder blades, palm facing outwards.
- Stretch the left arm up, fingertips pointing towards the ceiling, the palm of your hand still facing forward. Bend the elbow and reach down for the right fingertips, hooking the fingers together if they reach.
- So you now have your right knee on top and your left elbow pointing upwards
- Firm your shoulder blades against your back ribs and open your chest.
- Stay for a few breaths.
- To come out of the pose, release the arms, uncross the legs and repeat on the other side. Remember to switch legs as well as the arms. Whichever knee is stacked on top, the opposite side elbow is pointing upwards.
Beginners tips
- If you find it difficult to get into this pose, start the pose from all fours and cross your legs bringing your left knee to the inside of your right knee. Lower your hips in between your feet.
- If your sitting bones are not evenly resting on the floor, sit on a folded blanket, a block or a cushion. Make sure to keep your spine long.
- You can keep your lower leg stretched out in front of you or work with another hip opening pose like Pigeon pose
- If the fingertips don’t meet just point them towards each other or take hold of your top or use a strap. Hold the strap with the top hand, the lower hand can just grab the strap if you cannot reach the hands together.
Benefits
- Stretches the ankles, hips and thighs.
- Works your triceps and your rotator cuff and your upper back and chest muscles.
- Opens your chest and thoracic spine.
Watch out for
- Keep your head upright in line with the spine.
- In case of shoulder injury, move your arm within the pain-free range of motion or choose a less intense shoulder opener.
- Pay attention to avoid any discomfort in your knees. The rotation should come from your hips. If you have a knee injury you can practice just the actions of the arms while in a more comfortable seated position or standing.
FURTHER READINGS
- The complete yoga teachers’ guide – How to learn, earn & grow
- Free yoga resources – eBooks, music, asanas
- Yoga mat quiz – Which yoga mat is the best for me?
- Understanding about yoga
Variations
- You can intensify the stretch in this pose by folding forward. However, keep the weight in your sitting bones and not in your knees. Come out as you inhale.
Credits
| Model |
|
| Yoga Mat | b’EARTH & b’EARTH X by Beinks |
| Photographer | Sophie Dupont |
| Content | Tummee & Ekhart Yoga |