Summary of Contents
About the pose
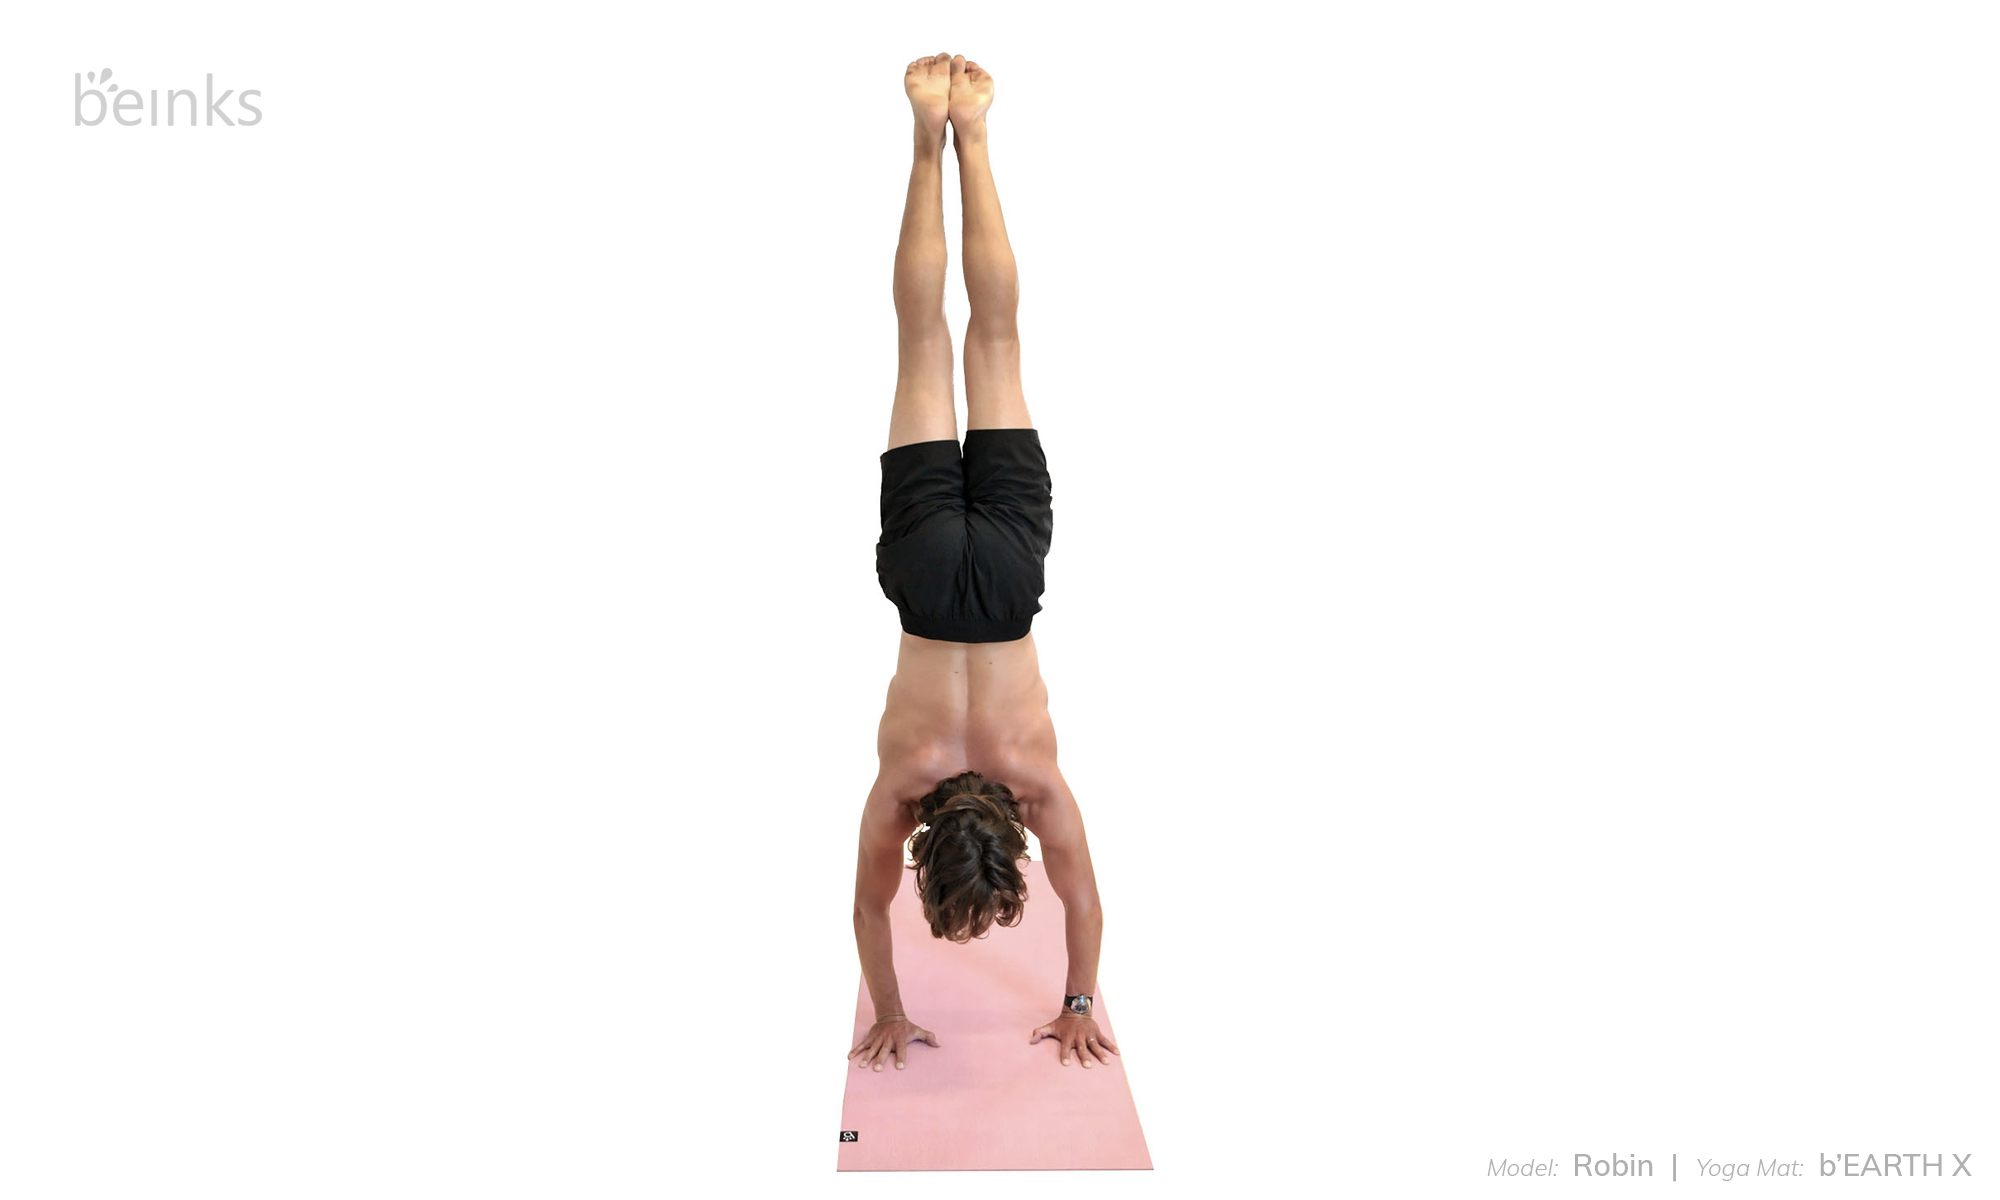
Adho Mukha Vrksasana (Handstand Pose) forms part of the arm balance sequence which requires the engaging of the physical and mental body, along with the practice of uddhiyana bandha. While the practice of Handstand Pose requires a strong foundation of the arms and shoulders, the ability to lift the hips up, awareness of the breath, core muscle strength, yet, the most important part of this practice is getting out of the fear of falling. Since it is a balancing posture, it requires utmost focus and concentration on the gaze or drishti, and breath. The level of confidence is improved, and with practice students will have a better control over the chattering of the mind – thus promoting a sense of calmness.
Since the most challenging part of this advanced pose is the fear of falling, a beginner to Adho Mukha Vrksasana can overcome this by practicing the same with the support of the wall. But the most important thing to keep in mind despite the use of the wall, is the alignment of wrists and shoulders, which is very essential. These variations apart from helping build confidence will also help familiarize the body with stacking the hips on top of the shoulders and wrists in one straight line. Though the best way to begin with the practice of Adho Mukha Vrksasana (Handstand Pose) is the repeated practice of Jump Through Pose, that forms part of most Vinyasa Yoga.
Anatomy
- Back
- Shoulders
- Arms
- Hands
- Wrists
How to do the pose
- Begin in Downward Facing Dog Pose (Adho Mukha Svanasana) and lift your head up to look between your palms. Keep your palms shoulder-width apart, with the index fingers parallel and pointing straight ahead. This means you need to turn your hands out slightly. Press the mat away from the shoulders using your palms. You will know you’re doing it correctly if your shoulders move towards your ears. Grip the mat with your fingertips and prepare to shift the weight forward.
- To send the hips up, you may opt for 2 methods:
- One- Leg Handstand Hop. From Adho Mukha Svanasana, send one leg up. Keeping your gaze fixed between your palms, inhale and hop up with the foot on the floor, sending the other leg overhead. This is a slow and controlled hop/jump, while keeping the lower belly sucked in. Keep gripping the mat with your fingertips to avoid falling. Your legs will make an L shape, and once you’ve found balance here – you can try sending the lower leg up.
- From downward dog, perform Handstand tucks like Bunny Hops Pose Handstand Prep (remember to always inhale as you jump into the pose) until you find balance and are able to hold your balance here. Next, keeping your thighs together slowly send the legs up and straighten them into the final pose.
- Maintaining a straight line in a handstand is very important, so as to avoid unnecessary pressure on the lower back. To do this, ensure that the belly is sucked in, and the ribs are constantly drawn in towards the abdomen to elongate the spine. While this may be hard to perform upside down, the student can practice this movement on the mat with Ardha Navasana Arms Forward (Half Boat Pose Arms Forward) and Ardha Navasana Arms Overhead (Half Boat Pose Arms Overhead), and incorporate the same when practicing a handstand.
- Often, students are able to jump into a Handstand Pose but are unable to hold themselves in balance. This can be achieved by engagement of the entire body – the palms press the shoulders away from the mat bringing them closer to the ears, the ribs are drawn in and belly in engaged, the thighs are together and rolled inward, and legs are actively reaching up.
- The gaze or drishti plays a very important role in maintaining balance, and drawing attention to the breath. The student must keep the gaze fixed at one point between the palms before attempting to send the hips up, and hold the gaze at that point for the entire duration of the asana.
- Once comfortable and in balance, pull yourself up lifting the shoulders and hips upwards. Hold for as long as is comfortable, ensuring the awareness of breath always.
- To release, initially the legs will drop down once you’re ready, but with practice, slowly bring one leg at a time towards the floor, and release the stacking of the joints gradually. Starting from the legs, knees, hips, rib cage, shoulders, and wrists.
- Relax and settle down in Balasana (Child Pose).
Benefits
Adho Mukha Vrksasana (Handstand Pose) requires a certain amount of strength, awareness of the body and breath, apart from flexibility of the shoulders and hip girdle. With these essentials, the benefits derived with the practice of this pose are explained:
- Strength and Flexibility: The practice of Handstand Pose is a combined effort of muscle groups like core (transverse and rectus abdominis, internal and external obliques), upper body (trapezius, triceps, deltoids), pelvic floor (psoas and adductors), and joints like hip flexors, shoulders and wrists. Hence, with repeated practice, all of the above will improve both in strength and flexibility.
- Adrenal Glands and Cardiovascular: At the beginners level the practice of Adho Mukha Vrksasana (Handstand Pose) requires the act of jumping up onto your hands, which when done many times builds energy in the body. This energy brings an adrenal rush, which helps to increase the blood flow to the brain and muscles. Thus making the heart beat go high, keeping the cardiovascular activity stimulated.
- Focus and Balance: The practice of Handstand Pose requires balancing skills that comes with focus and concentration to keep the shoulders aligned with the wrists. The most challenging part of this practice is to hold the body upright without flipping back, and initially this is difficult. Since the brain gets disoriented when in an upside down position, with focus and better balance, this can be overcome. Over time the sensation of the sudden blood supply to the brain will also be overcome, with better focus and balance.
- Energy and Breath Awareness: When upside down, the weight of the abdominal organs press into the diaphragm, expanding it. This allows for the lungs to take in deeper breaths – which means that a larger amount of carbon-dioxide is expelled from the body in one breath. This increases overall energy and prana in the body with better breath awareness.
- Spine and Bone: The practice of Adho Mukha Vrksasana (Handstand Pose) when done over time and with better balance helps elongates and lengthen the spine. When the spine is lengthened in an inverted position, it helps in reversing degeneration of the spine due to compression. The anti-gravity effect on the legs and lower body helps release the buildup of lactic acid. This helps muscles of the legs heal faster by relieving pressure on the joints and feet, so this may be a good asana to include after a lot of standing, squatting, and balancing leg poses. Thus, a Handstand Pose can be your ticket to a happy, healthy spine!
- Stress and Calmness: How can an asana so intense help someone relax, you ask? The answer lies in the reversed blood circulation. This inverted position provides an influx of blood and oxygen to the brain, which in turn sends signals to the body’s nervous system. The parasympathetic nervous system activates, and this helps in reduction of the stress hormone – cortisol. This helps combat mild depression and/or anxiety. Handstand your way into a better mood! Thus having a calming effect on the nervous system.
- Others: Last but not least, like other inversion, this pose also helps with increased blood circulation in the head and face, improving the texture of the skin and hair. Also inversions activate the last two chakras in particular. Sthiram when achieved with the practice of Handstand Pose (Adho Mukha Vrksasana) helps to bring a new perspective to life, with the activation of the Crown Chakra (Sahasrara Chakra). This brings a humbling effect making it a grounding practice.
Watch out for
Adho Mukha Vrksasana (Handstand Pose) forming part of inversions and advanced poses, comes with some precautions to keep in mind when teaching the same to beginners. These are mentioned below:
- Women: Because of the strenuousness of this asana, pregnant women must not practice it. The added weight of the abdomen and uterus could make it harder to breathe. Menstruating women should avoid this asana for the duration of their cycle, as it will hamper the blood flow.
- Heart and Blood Pressure: As mentioned before, jumping into Handstand Pose is a cardiovascular activity and people suffering from high blood pressure, or heart issues must not practice it. Students with the history of low blood pressure too must take it easy and practice the same under the guidance of a yoga teacher, as the sudden blood rush to the head may cause dizziness.
- Anxiety and Depression: While the practice of Handstand can help some with issues related to anxiety and depression, yet care should be taken if students conditions are severe. The sudden flow of blood, lack of confidence, being an inversion, lack of breath awareness, etc., would all add up to making their symptoms worse, hence best to avoid.
- Injury and Surgery: Students suffering from any wrist of shoulder injuries should wait until completely healed. They can do the beginner variations and gauge if the upper body is ready to bear the weight, before attempting this advanced variation. Injury related to any other part of the body are contraindications, due to the pressure in an upside down posture. Students who have had any sort of surgery of the internal organs must not attempt this asana, before approval from their physician.
- Back problems: Students with any spinal issues like slip disk or disk bulge should not attempt the practice of Adho Mukha Vrksasana (Handstand Pose) due to the pressure on the vertebrae while in upside down position.
FURTHER READINGS
- The complete yoga teachers’ guide – How to learn, earn & grow
- Free yoga resources – eBooks, music, asanas
- Yoga mat quiz – Which yoga mat is the best for me?
- Understanding about yoga
Variations
- You can try Handstand At Wall, and Half Handstand Wall – to understand the alignment of having the hips stacked over the shoulders and wrists, and allow for the weightless feeling when it happens. Also to initially get over the fear of falling, building confidence.
Credits
| Model | Robin (Yoga Peda) – An Ambassador of Beinks |
| Yoga Mat | b’EARTH & b’EARTH X by Beinks |
| Photographer | Sophie Dupont |
| Content | Tummee & Ekhart Yoga |