Summary of Contents
About the pose
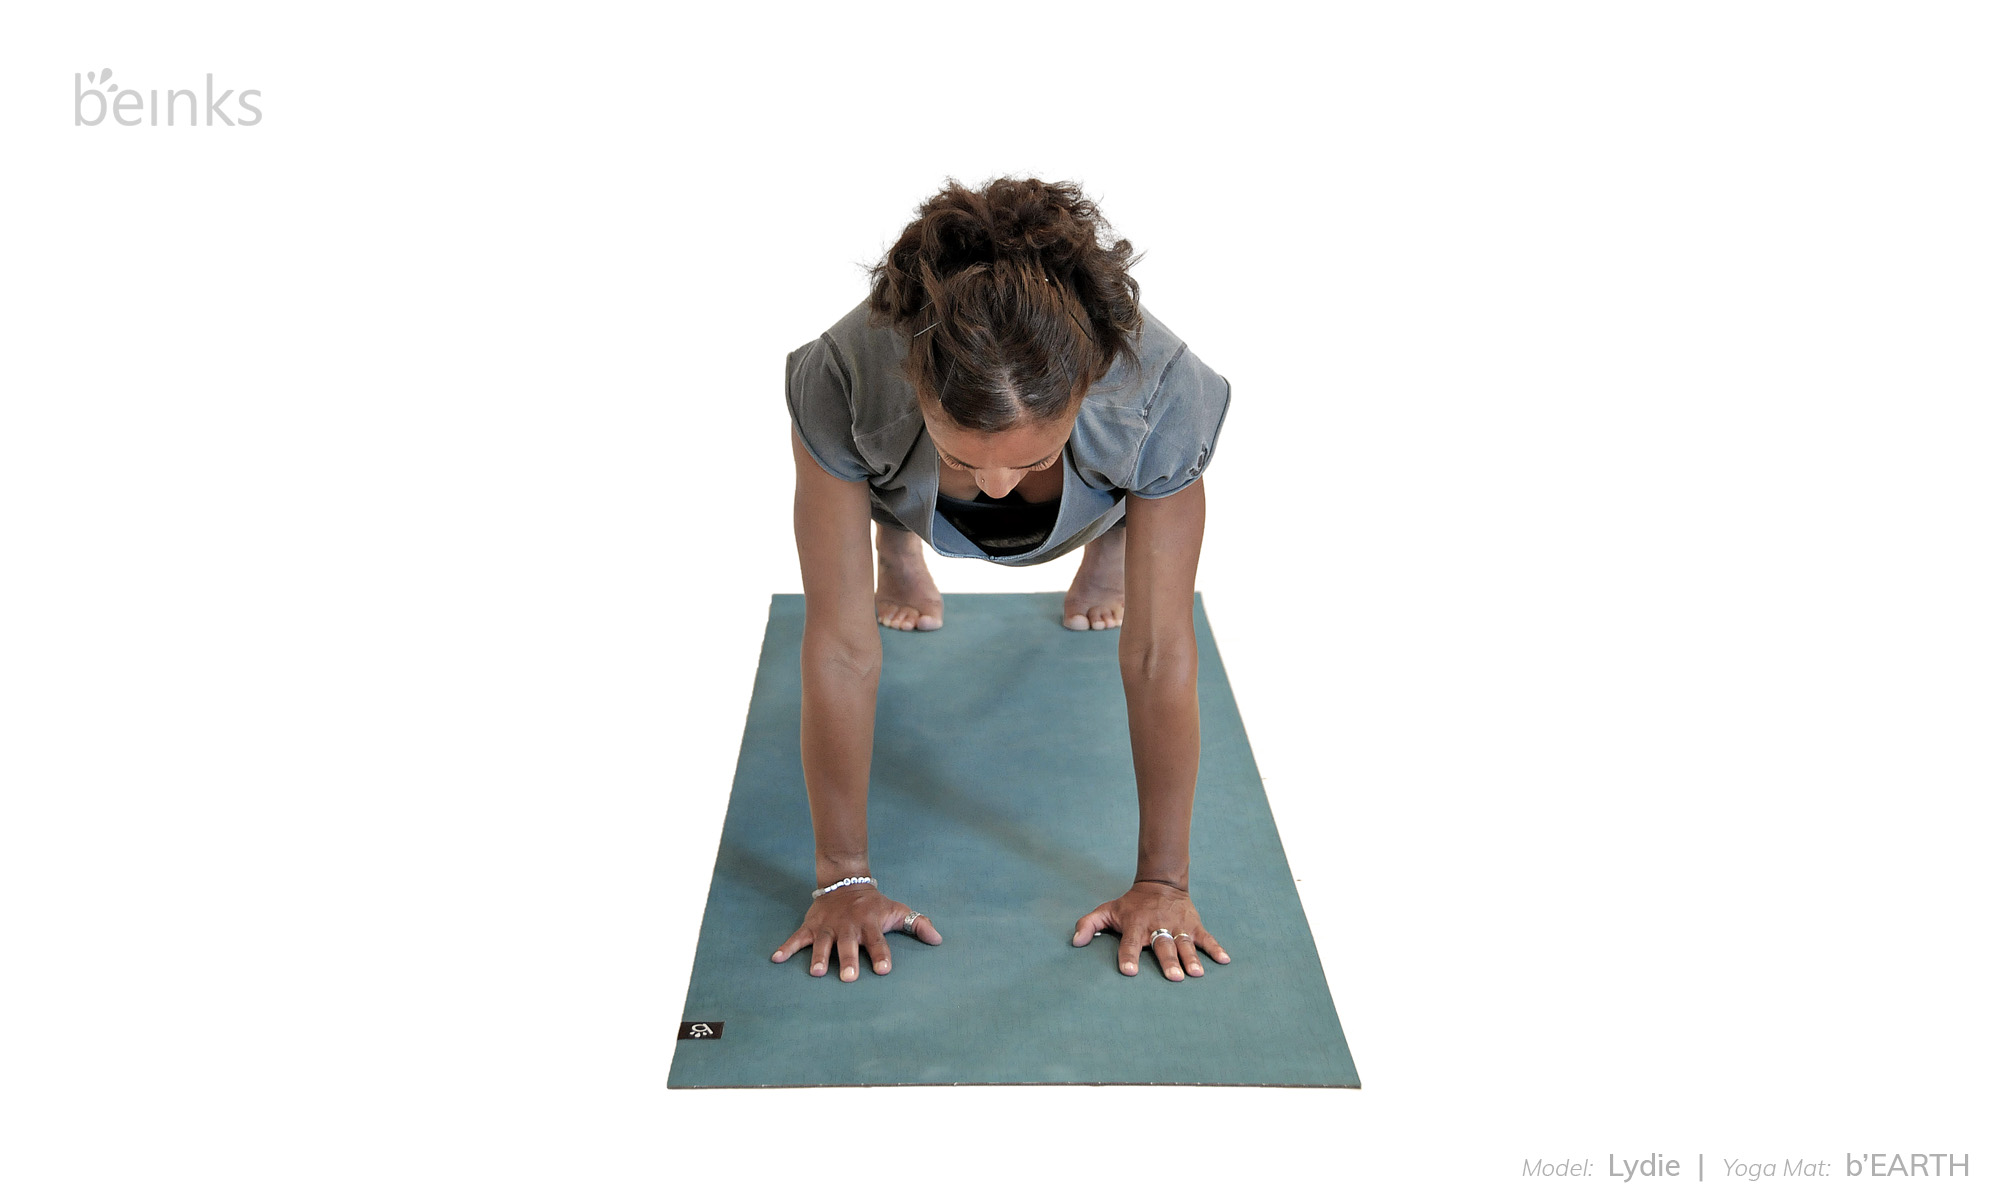
Plank Pose (Phalakasana), as the name suggests, the body is held in a way that looks like a plank, thin and long. In Plank Pose a lot of emphasis is on the muscles at the core and the shoulders. This pose essentially works for someone who wants to take the arms and shoulder strength to the next level in order to do more difficult arm balancing yoga poses.
Plank Pose is considered a base pose as plank pose variations can be derived from this pose. Plank Pose helps boost energy in the body and hence can be included in flow yoga sequences.
Anatomy
Plank Pose benefits the following muscles and hence can be included in yoga sequences with the corresponding muscle(s) focus:
- Arms and Shoulders
- Lower Back
- Biceps and Triceps
- Core (Abs)
How to do the pose
- From all fours bring your shoulders over your wrists, fingers spread, middle finger pointing forward. Press your hands into the floor, firm the upper arms in towards each other.
- Draw the lower belly in and up.
- Extend one leg back with your toes tucked and then the other leg, so you are in a high push-up position. Your body is in a straight line from head to heels.
- Slide your shoulder blades down along the spine, firm them into the back and press the space between the shoulder blades up towards the ceiling.
- Engage your thigh muscles and lengthen the tailbone towards your heels.
- Keep pushing the floor away evenly with the palms of the hands and imagine you’re pressing the heels back against a wall.
- Draw the legs together without actually moving them. This creates more core strength and stability.
- Look at the floor slightly forward, jaw relaxed. Breath is even and steady.
- You can stay in this pose anywhere between 5 breaths to a couple of minutes.
- To come out of the pose, push yourself back into Downward Facing Dog or lower the knees to the floor and rest in Child’s pose.
Beginners tips
- Think about the front of the body drawing up towards the back of the body.
- Don’t forget about your thighs – engaging the thigh muscles will also help to activate the abdominal strength you need for Plank pose.
- Try squeezing a block between your thighs to feel the action of the legs drawing together
- Build your strength up by practising Half-Plank with your knees on the floor. Keep a straight line from your knees to your head.
- If you are new to yoga, gradually increase the time you spend on your hands in poses like Plank and Downward Facing Dog so that you can build up strength in the wrist muscles.
Benefits
- Strengthens and tones your whole body.
- Develops core strength and stability.
- Prepares the body for other arm balances.
Watch out for
- If you have sore wrists roll up your mat or a towel and place it under the heel of your hand to reduce the angle of the bend of the wrists.
- If you have a more serious wrist injury or carpal tunnel syndrome substitute Plank for a Forearm Plank.
- Take care that you are not dropping the hips or lifting them higher than the line of your body.
FURTHER READINGS
- The complete yoga teachers’ guide – How to learn, earn & grow
- Free yoga resources – eBooks, music, asanas
- Yoga mat quiz – Which yoga mat is the best for me?
- Understanding about yoga
Variations
- Practise Core Planks by bringing the right knee to your chest then back, then to your right upper arm, then across your body to your left arm. Repeat three times on each side
- Try lifting one foot off the floor keeping the leg straight. Keep the leg lifted as you transition into Chaturanga or a Three-Legged Downward Dog.
Credits
| Model | Lydie |
| Yoga Mat | b’EARTH & b’EARTH X by Beinks |
| Photographer | Sophie Dupont |
| Content | Tummee & Ekhart Yoga |


